How to Build a SharePoint Employee Directory with Pictures
Learn how to build a SharePoint employee directory step-by-step, explore its limitations, and discover why OneDirectory offers a superior alternative.

A SharePoint employee directory can be a practical starting point if your company already uses Microsoft 365 and you need a simple place for employees to find each other.
You can use it to show names, job titles, departments, locations, email addresses, phone numbers, profile photos, and other useful employee details. For a small team, that may be enough.
But it is worth being honest upfront.
SharePoint can help you build a basic employee directory. It is not, on its own, a dedicated employee directory platform. The setup is fairly straightforward. The long-term maintenance is usually where the real work begins.
In this guide, I’ll walk through how to build a SharePoint employee directory step by step, including how to add profile pictures, create useful views, publish the directory, and manage permissions. I’ll also cover where the SharePoint approach starts to struggle, especially as your company grows.
Before you start
Before building your SharePoint employee directory, spend a few minutes getting the basics right. This will save you a lot of cleanup later.
1. Confirm who owns the directory
Someone needs to be responsible for the data. That could be HR, IT, People Operations, or an office admin.
Without a clear owner, employee directories get stale quickly. A new hire joins. Someone changes department. A manager changes. A phone number is wrong. Nobody updates it because everyone assumes someone else owns it.
That is how directories die.
2. Check your permissions
You will need permission to create or edit SharePoint sites, lists, pages, and permissions. If you do not have those rights, work with your Microsoft 365 or SharePoint administrator.
For most companies, this is not something every employee should be able to edit.
A sensible setup is:
- Everyone can view the employee directory.
- Only HR, IT, or assigned directory owners can edit employee data.
- Sensitive fields are excluded unless there is a clear business reason to show them.
3. Decide which employee fields you need
Do not add every possible field just because you can.
Start with the details people actually search for:
- Name
- Job title
- Department
- Location
- Phone number
- Manager
- Profile picture
- Skills or areas of expertise
For example, if an employee needs to find “someone in Finance in Dublin” or “the person who looks after onboarding,” your directory should make that easy.
If a field does not help employees find, understand, or contact the right person, leave it out.
4. Check your Microsoft 365 profile data
If your company uses Microsoft 365, some employee details may already exist in Microsoft Entra ID, formerly Azure Active Directory.
This matters because SharePoint can use Microsoft 365 profile information in some areas, especially when working with people fields and profile cards.
However, a custom SharePoint list will not magically become a fully automated employee directory unless you build or configure that process. If you manually create the list, you will usually need to manually maintain the list too.
That is fine for a small team. It becomes painful for larger or fast-changing organizations.
Step-by-Step Guide: Building Your SharePoint Employee Directory
Step 1: Set Up Your SharePoint Site
If you already have a suitable SharePoint site, you can use that.
If not, create a new site for your employee directory.
How to create a SharePoint site
- Open SharePoint from Microsoft 365.
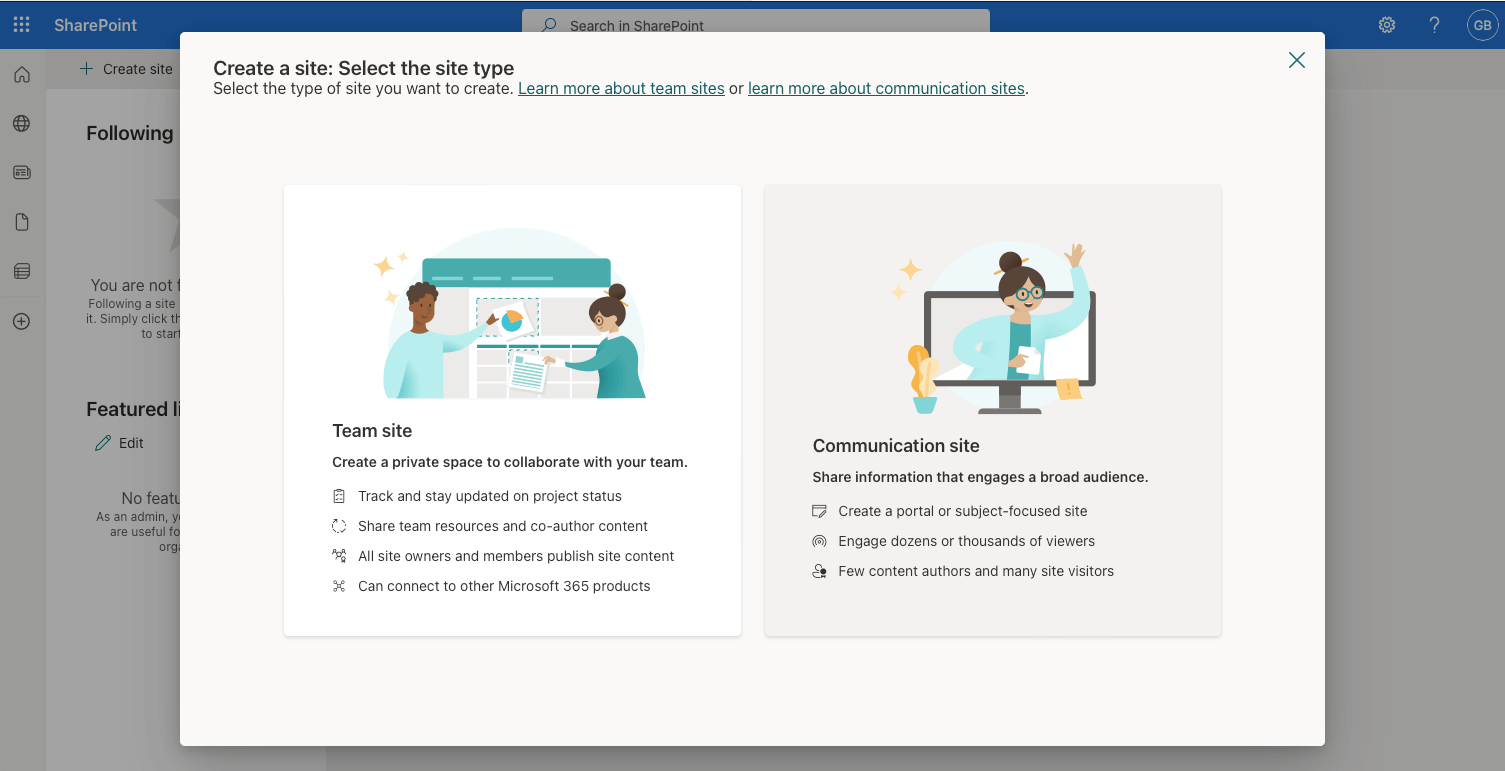
- Click Create site.
- Choose either a Team site or Communication site.
- Name the site clearly, for example: Employee Directory or Company Directory.
- Set the privacy and access settings.
- Add the right owners and members.
For a company-wide SharePoint employee directory, a Communication site is often the better fit. It is designed for publishing information broadly across an organization.
A Team site can work too, especially if the directory is only for a department or project group.
Step 2: Create a List for Your Employee Information
Next, create the list that will hold your employee data.
This list is the foundation of your SharePoint employee directory.
How to create the list
- Go to your SharePoint site.
- Click the Settings gear icon.
- Select Site contents.
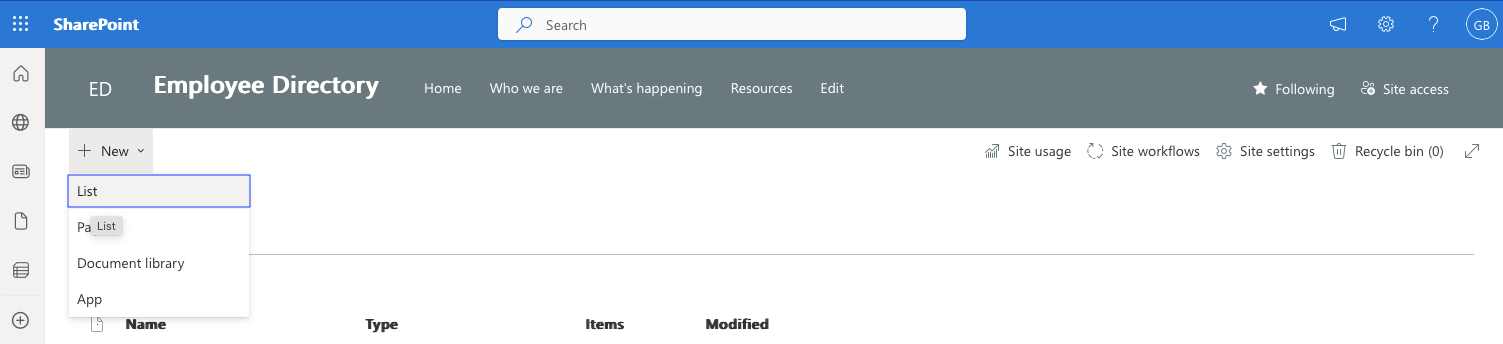
- Click New.
- Select List.
You will usually see a few options:
- Blank list
- From existing list
- From Excel
- From CSV

If you already have employee data in a spreadsheet, using From Excel or From CSV can save time.
Just check the spreadsheet first. Clean up duplicate rows, old employees, inconsistent department names, and missing email addresses before importing anything into SharePoint. Bad data does not become good data because it moved into a list.
If you are starting from scratch, choose Blank list.
Name the list something obvious, such as Employee Directory.
Add a short description, for example:
A company-wide employee directory with names, job titles, departments, locations, contact details, and profile pictures.
Make sure the list is easy to find in the site navigation if employees or admins will need direct access to it.
Step 3: Customize the List Columns
Add Columns for Your Employee Information
Now you need to decide what information your directory should display.
Open your new list and click Add column.
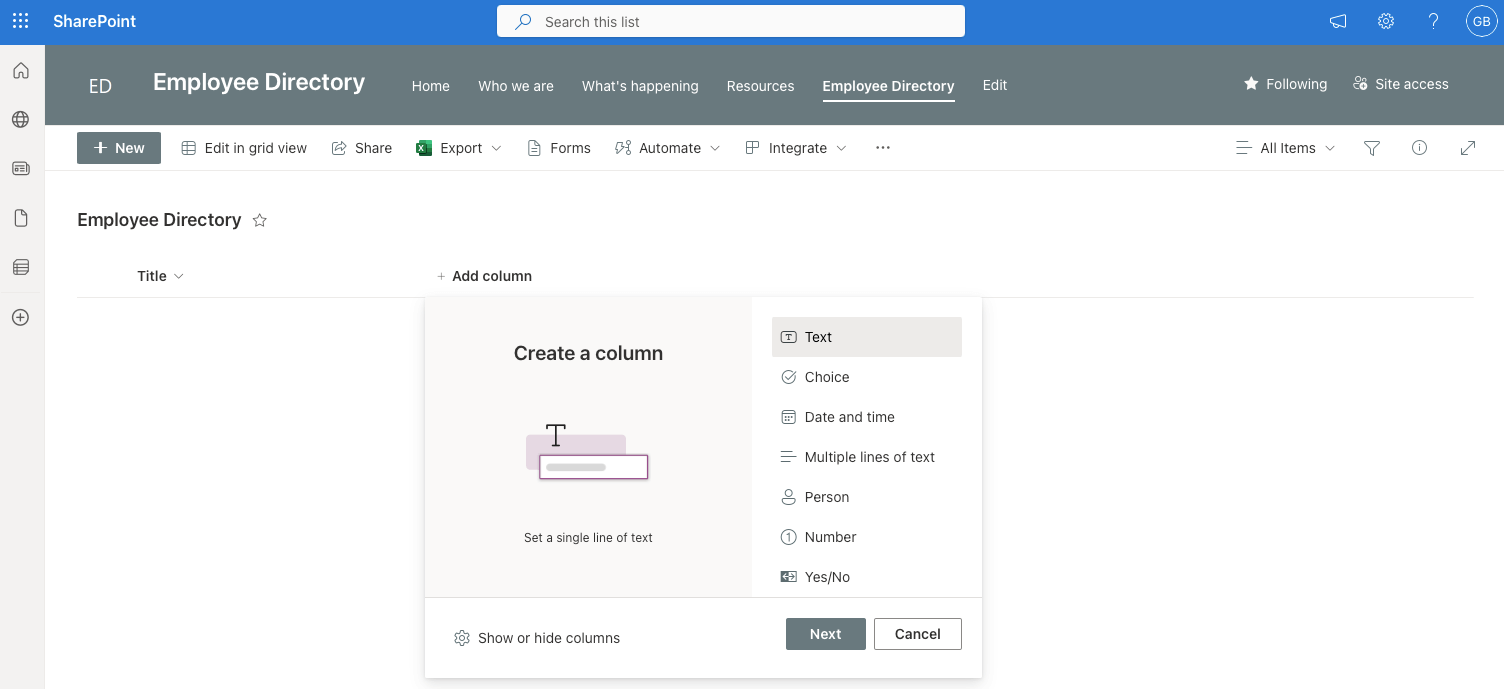
Here is a practical starting point.
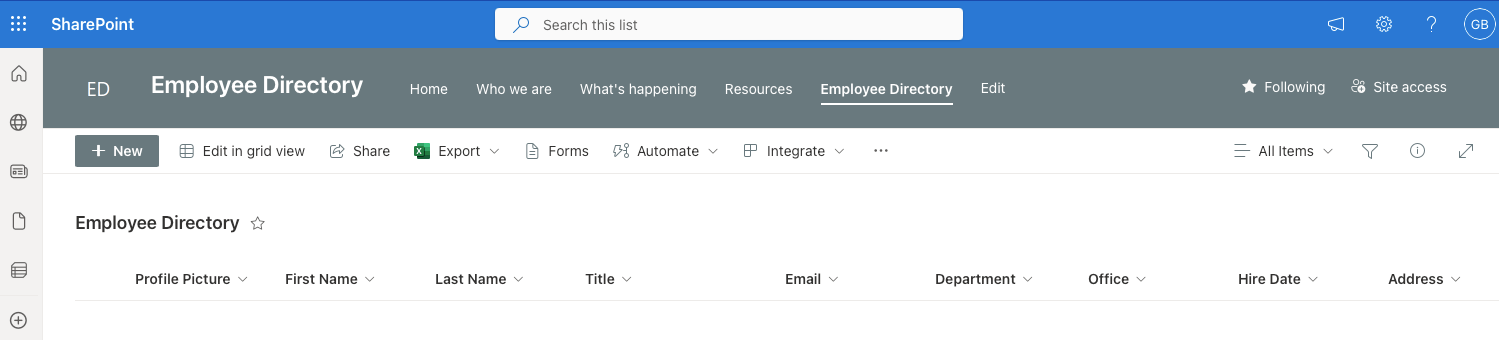
| Field | Recommended column type | Notes |
|---|---|---|
| Employee | Person or Group | Useful if you want to connect the entry to a Microsoft 365 user profile. |
| First name | Single line of text | Helpful for sorting and filtering. |
| Last name | Single line of text | Useful for alphabetical directory views. |
| Job title | Single line of text | Keep naming consistent. Avoid five versions of the same title. |
| Department | Choice | Use controlled options such as HR, Finance, Sales, IT, and Marketing. |
| Location | Choice or Single line of text | Choice works well if you have fixed office locations. |
| Single line of text or Hyperlink | A hyperlink can make the email address clickable. | |
| Phone number | Single line of text | Do not use number format if you need leading zeros, spaces, brackets, or country codes. |
| Manager | Person or Group | Useful if you want to show reporting lines. |
| Profile picture | Image, Picture, or Hyperlink | Depends on the list options available in your SharePoint environment. |
| Skills | Choice or Managed metadata | Useful if employees search by expertise. |
| Hire date | Date and time | Optional. Only show it if there is a good reason. |
A quick note on phone numbers: using a number column sounds logical, but it often creates formatting problems. Phone numbers are not really numbers in the spreadsheet sense. They can include plus signs, spaces, brackets, and leading zeros. A text field is usually safer.
Also, be careful with sensitive information. An employee directory should help people connect. It should not become a dumping ground for private HR data.
Step 4: Populate your SharePoint List with Your Employee Data
You have two main options here: manual entry or bulk import.
Option 1: Add employees manually
Manual entry is fine for a small team.
To add a person:
- Open the Employee Directory list.
- Click New.
- Fill in the employee details.
- Add the profile picture if you are using a picture or image field.
- Click Save.
This gives you control, but it is slow. It also becomes easy to miss updates when people move teams or change roles.

Bulk Import your Employee Data
If you already have employee data in Excel or CSV format, bulk import is usually faster.
Before importing, make sure your spreadsheet columns match the fields you want in SharePoint.
For example:
- First Name
- Last Name
- Job Title
- Department
- Location
- Phone Number
- Manager
- Profile Picture URL
Clean the data first. Look for old employees, blank departments, inconsistent locations, and duplicate records.
Then create the list from Excel or CSV, or use grid view to copy and paste data into an existing SharePoint list.
In SharePoint, Edit in grid view can be useful for bulk editing because it behaves more like a spreadsheet.
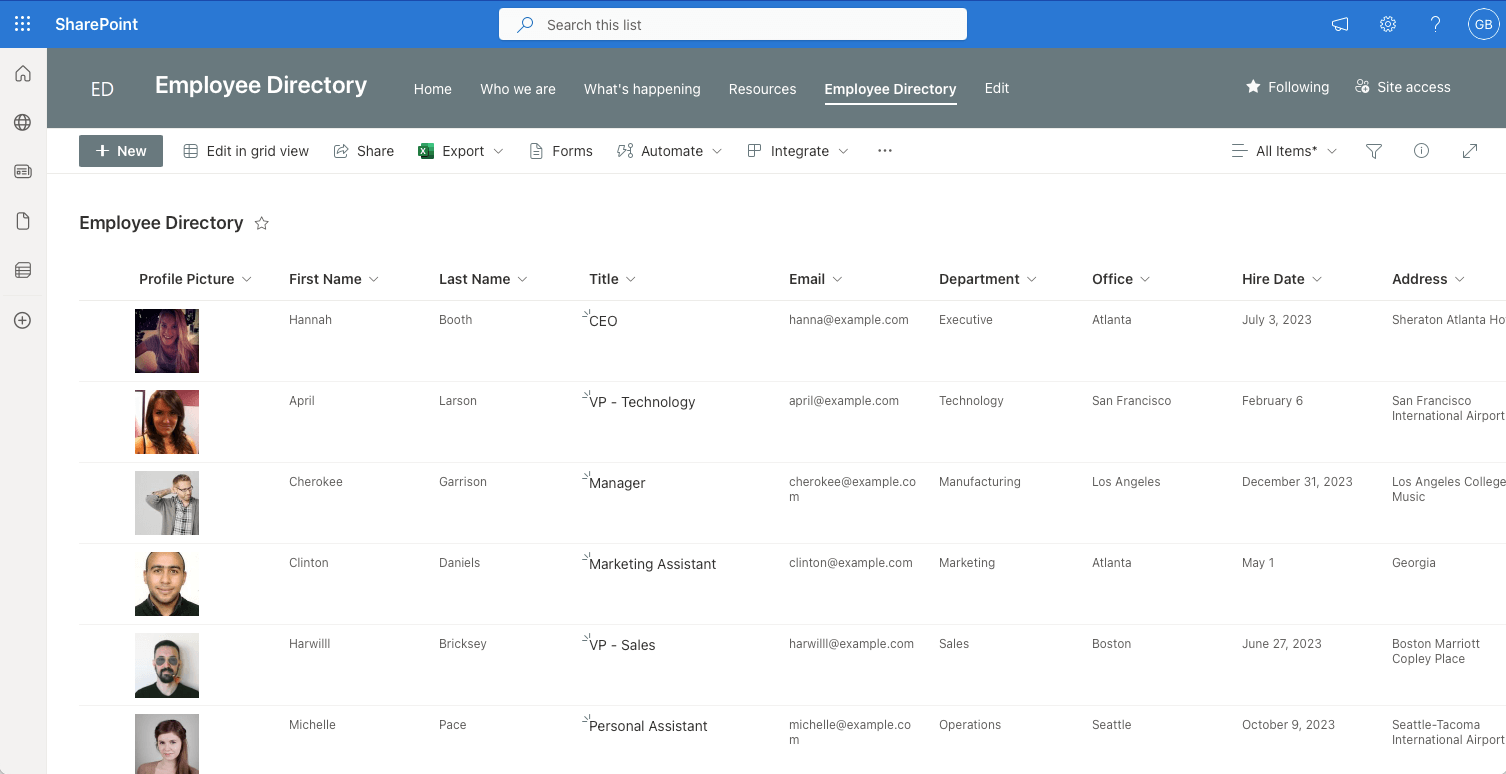
Step 5: Create a Custom View
Profile pictures make a directory much easier to use.
People often recognize a face before they remember a surname, especially in larger companies or remote teams.
You have a few options for adding pictures to your SharePoint employee directory.
Option 1: Use a profile picture column
Add an image or picture column to your SharePoint list, depending on what is available in your tenant.
This works well if you want to manage pictures directly inside the list.
The downside is maintenance. If someone changes their Microsoft 365 profile photo, your manually uploaded list image may not update automatically.
Option 2: Use a hyperlink to the employee photo
You can also store a URL that points to a profile image.
This is simple, but it depends on the image being stored somewhere reliable and accessible to the right people.
Do not link to personal OneDrive files unless you are confident the sharing permissions will remain stable.
Option 3: Use SharePoint people features where appropriate
If you use a Person or Group column, SharePoint can connect that person to their Microsoft 365 profile. This can help employees access profile cards and contact details.
You can also use the People web part on a SharePoint page, but that is better for showing a small group of people, such as a leadership team or project team. It is not ideal as a full company-wide employee directory because you need to add people manually.
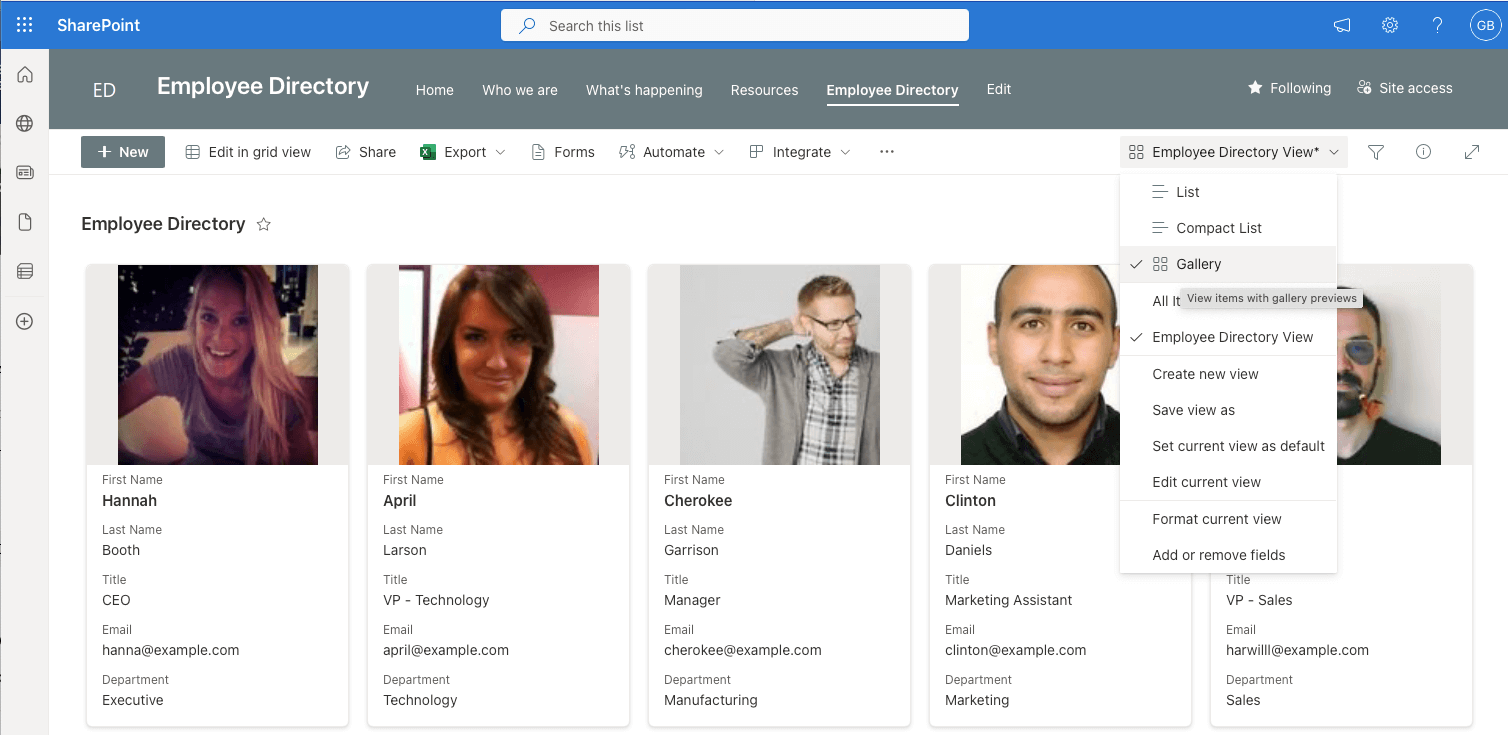
Change your Employee Directory View
- Click on your new view (e.g., "Employee Directory View").
- You can now choose between, 'List', 'Compact List', and 'Gallery'
Step 6: Create a Page for Your Employee Directory
Now create a page where employees can access the directory.
You do not want people digging through Site contents to find a list. Put the directory somewhere obvious.
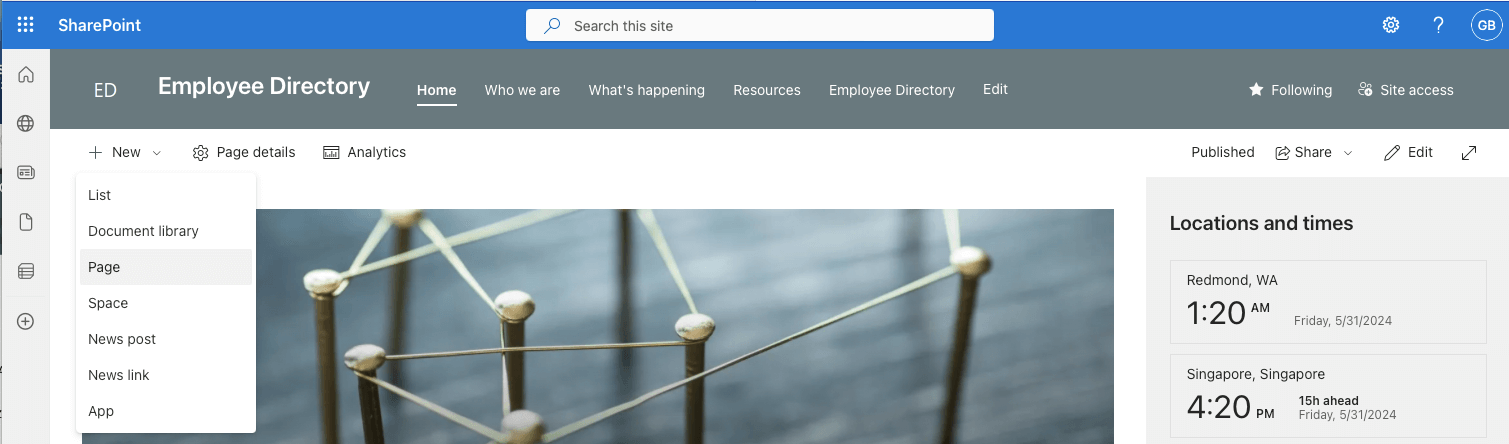
How to create the page
- Go to your SharePoint site homepage.
- Click New.
- Select Page.
- Choose a simple layout.
- Name the page Employee Directory.
- Add a short introduction.
For example:
Use this directory to find colleagues by name, department, location, or role. If your details are incorrect, contact HR or IT to request an update.
Keep it short. Employees are not there to read a policy document. They are there to find a person.
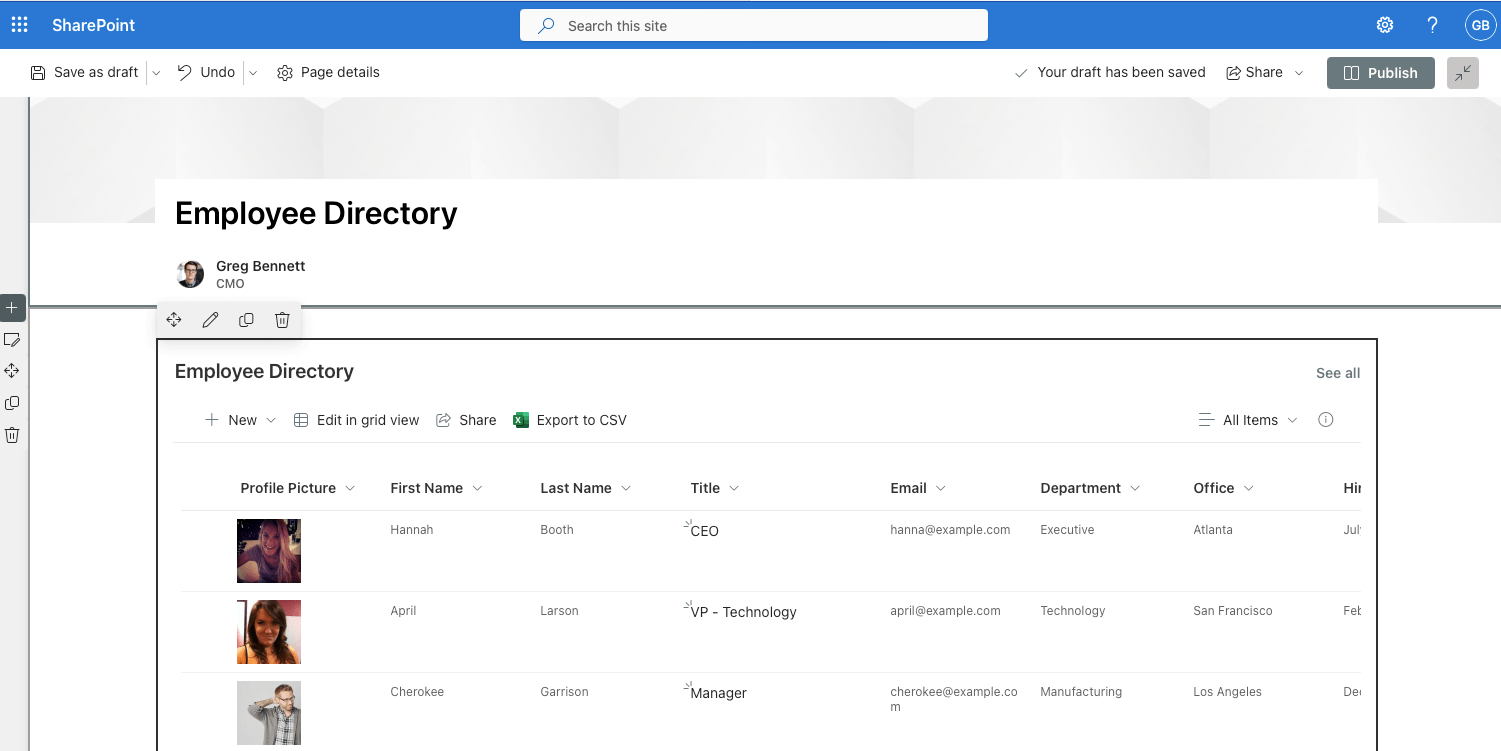
Step 7: Add the List web part
The List web part lets you display your employee directory list on the SharePoint page.
To add it:
- Edit the employee directory page.
- Click the + icon to add a web part.
- Search for List.
- Select the List web part.
- Choose your Employee Directory list.
- Select the view you want to display.
- Adjust the display settings.
- Save or publish the page.
This gives employees one clean page where they can browse, sort, filter, and search the directory.
Step 8: Manage Permissions
Permissions are easy to overlook. Do not skip this step.
A company directory should usually be visible to all employees, but editable by only a small group.
Check permissions for:
- The SharePoint site
- The employee directory list
- The employee directory page
- Any image library or folder used for profile pictures
- Go to your list or page settings.
- Click on "Permissions for this list" or "Page permissions."
- Adjust the permissions to control who can view or edit the directory.
By following these steps, you can create a basic and functional employee directory in SharePoint for your employees to use.
Step 9: Publish and test the directory
Once the page is ready, click Publish.
Then test it like a normal employee would.
Ask yourself:
- Can I find someone by name?
- Can I filter by department?
- Can I filter by location?
- Are job titles easy to understand?
- Do profile pictures load correctly?
- Does the page work on mobile?
- Can regular employees edit anything they should not edit?
- Is there a clear way to report incorrect information?
That last point matters.
Every directory needs a feedback loop. Add a simple line near the top of the page:
See something wrong? Contact HR or IT to update your employee profile.
The easier you make it to report bad data, the longer your directory will stay useful.
Additional Resources
- Microsoft SharePoint Documentation
- Power Automate Templates for SharePoint
- Microsoft Graph API for Directory Queries
Let's Be Honest: Building a SharePoint Employee Directory is Not Ideal
A SharePoint employee directory can work.
But there are limits.
The biggest issue is that you are building a directory out of general-purpose SharePoint components. Lists, columns, views, pages, and web parts can get you part of the way there, but they do not give you a polished people-search experience by default.
Here is where teams usually start to feel the pain.
- Manual updates become a burden
- Search is limited
- Org structure is hard to show well
- The user experience can feel like a list
When you need something more than SharePoint
You may need a dedicated employee directory if:
- Your company is growing quickly.
- Employees often change roles, teams, or locations.
- You need reliable Microsoft 365 or Microsoft Entra ID syncing.
- People need to search by skills, department, manager, or location.
- You want a proper org chart.
- You want richer employee profiles.
- You do not want HR or IT manually maintaining directory data.
- Employees complain that they cannot find the right person.
That is usually the point where a basic SharePoint staff directory starts to become more admin work than it is worth.
A Simpler Alternative: OneDirectory
If you only need a basic SharePoint employee directory, the steps above will get you there.
But if you want a modern employee directory that stays accurate and is easy for employees to use, OneDirectory is built for that job.
OneDirectory connects with Microsoft 365 and Microsoft Entra ID so employee information can stay in sync without someone manually updating a SharePoint list every time a job title, department, location, or manager changes.
It also gives employees a more natural way to find people, understand teams, and explore the organization.

With OneDirectory, you get:
- Fast people search
- Detailed employee profiles
- Microsoft 365 and Entra ID syncing
- A searchable employee database
- Interactive org charts
- Custom fields and views
- Better visibility across departments, locations, and reporting lines
SharePoint can be a good starting point.
OneDirectory is a better fit when the directory becomes important enough that people rely on it every day.
SharePoint Employee Directory Frequently Asked Questions
What is a SharePoint employee directory?
A SharePoint employee directory is a centralized list within SharePoint that contains detailed information about employees, such as names, job titles, departments, contact details, and profile pictures, facilitating easy access and communication among staff.
Can I include profile pictures in the SharePoint employee directory?
Yes, you can include profile pictures by adding a 'Picture' column in your SharePoint list or by using the People Web Part, which automatically displays profile images from Active Directory.
Is it possible to create an employee directory in SharePoint without coding?
Absolutely. SharePoint provides user-friendly tools like custom lists, the People Web Part, and the Gallery View, allowing you to create an employee directory without any coding experience.
What are the limitations of using SharePoint for an employee directory?
Some limitations include manual data maintenance, potential inaccuracies if not regularly updated, and limited search functionalities. For enhanced features, consider third-party solutions like OneDirectory, which offer automated syncing and advanced search capabilities.