How to Build Your Employee Directory in Google Sheets (Plus Free Template)
Build a simple employee directory in Google Sheets: copy our free template, add structured columns, enforce consistency with data-validation dropdowns, filter and freeze headers, protect sensitive info—then share or effortlessly switch to OneDirectory for automated, searchable, org-wide visibility.

In this guide, we'll walk through how to create a simple yet effective employee directory using Google Sheets.
Google Sheets is a free, web-based spreadsheet application that makes it easy to build and manage an employee directory.
Step 1: Organize Your Employee Information
Before creating an employee directory, it's important to gather and organize relevant employee information into a centralized database. This includes details like full names, job titles, department, office location, contact info (email, phone, extension), start date, manager, and any other key data points about each team member.
Take time to collect accurate, up-to-date details and input them in a consistent format. For example, follow the same capitalization, date formats, and phone number style across entries. Maintaining clean, structured data from the start makes it easier to manage your employee directory long-term.
The goal is to create a usable, accessible resource for your organization. With the foundation of organized employee information in place, you'll be set up for success when it comes time to build out your staff directory in Google Sheets or any other platform.
Step 2: Create a New Spreadsheet
- Go to Google Sheets and log into your Google account.
- Click on the “Blank” template to create a new spreadsheet.
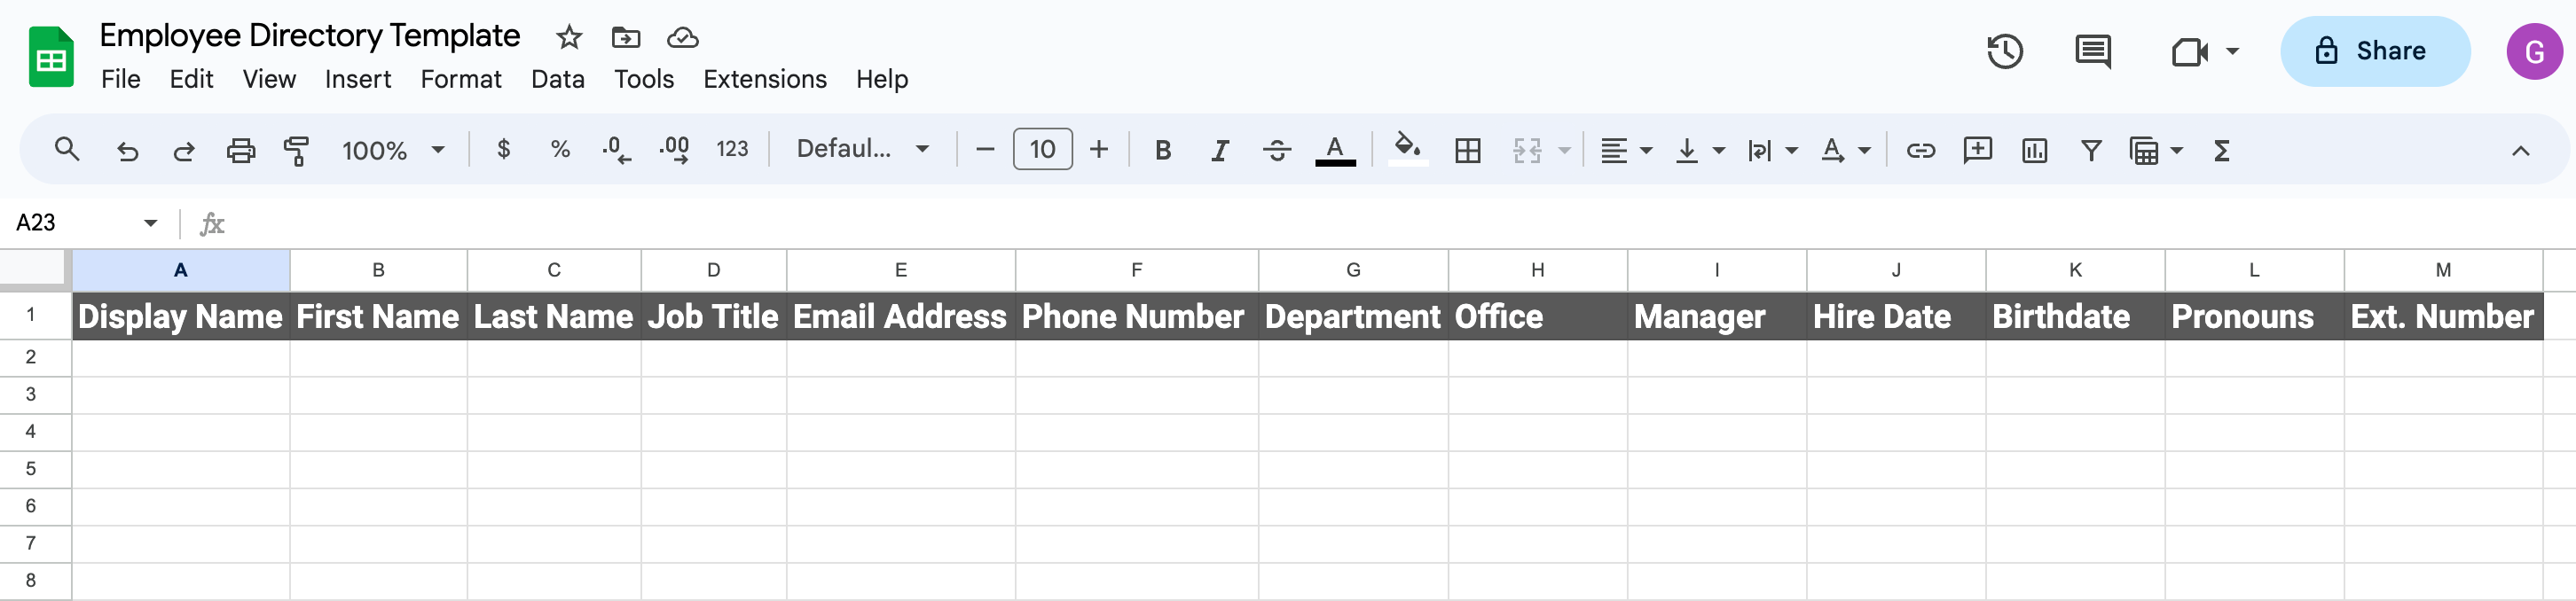
Step 3: Add Column Headers
- Rename Sheet1 at the bottom to "Employee Directory"
- In cell A1 type "Display Name"
- In cell B1 type "First Name "
- In cell C1 type "Last Name"
- In cell D1 type "Job Title"
- In cell E1 type "Email Address"
- In cell F1 type "Phone Number"
- In cell G1 type "Department"
- In cell H1 type "Office"
- In cell I1 type "Manager"
- In cell J1 type "Hire Date"
- In cell K1 type "Birthdate Date"
This creates column headers for the key pieces of information you want to track for each employee.
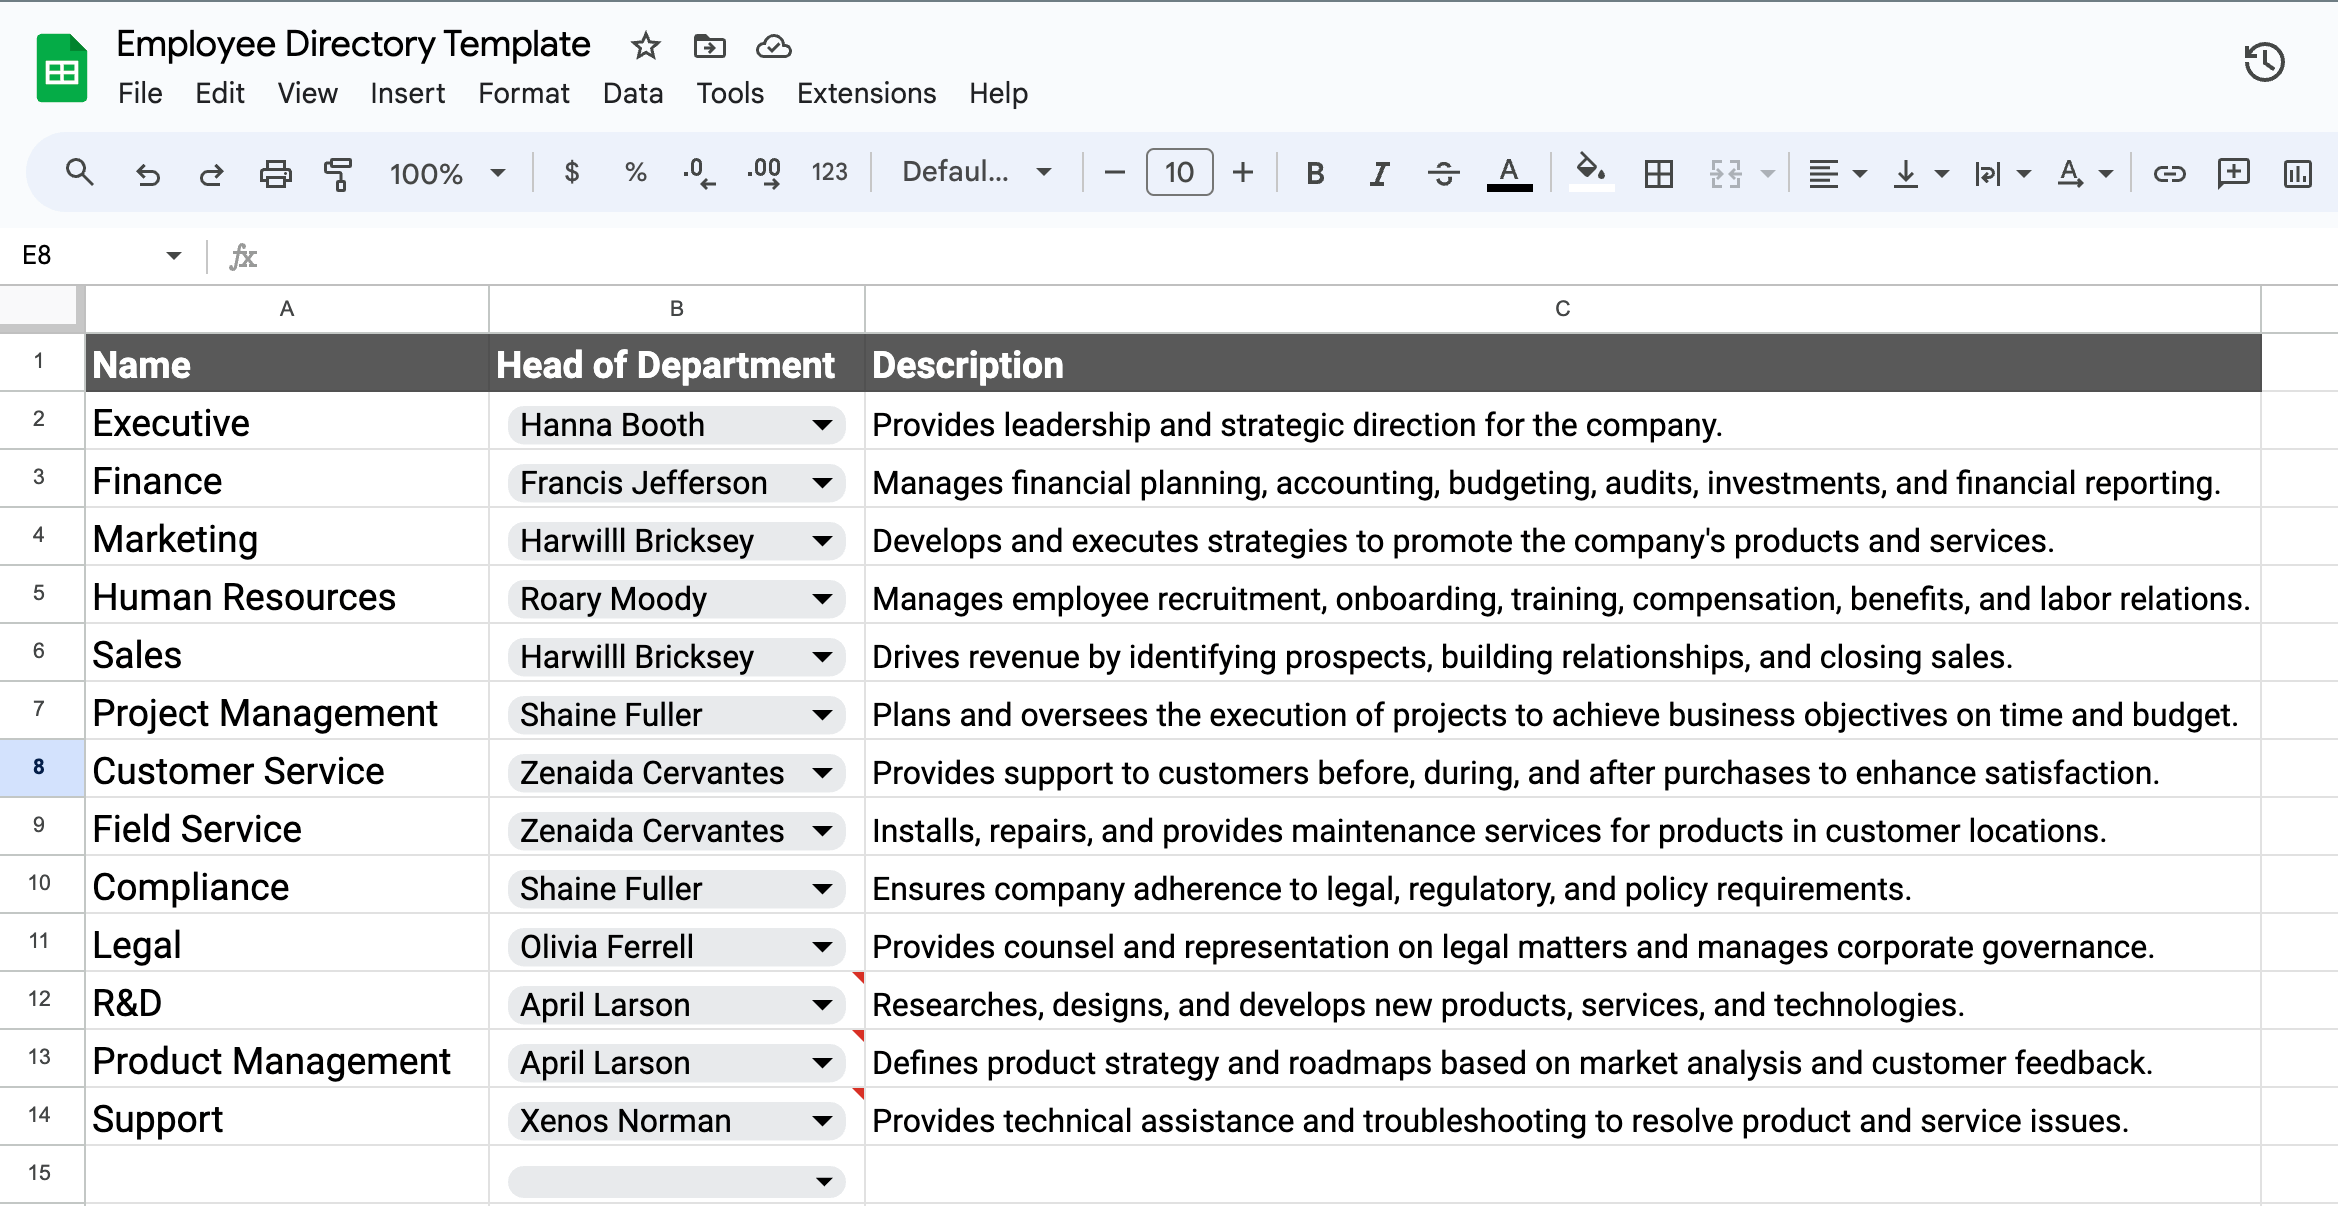
Step 4: Make a Department Directory
- Create a new sheet and name it "Departments"
- In cell A1 put "Department"
- In cell B1 put "Department Head"
- In cell C1 put "Description"
- In column A, list each department
- In column B, put the name of the department head
- In column C, add the overview description of that department
This gives you a simple directory of all your departments.
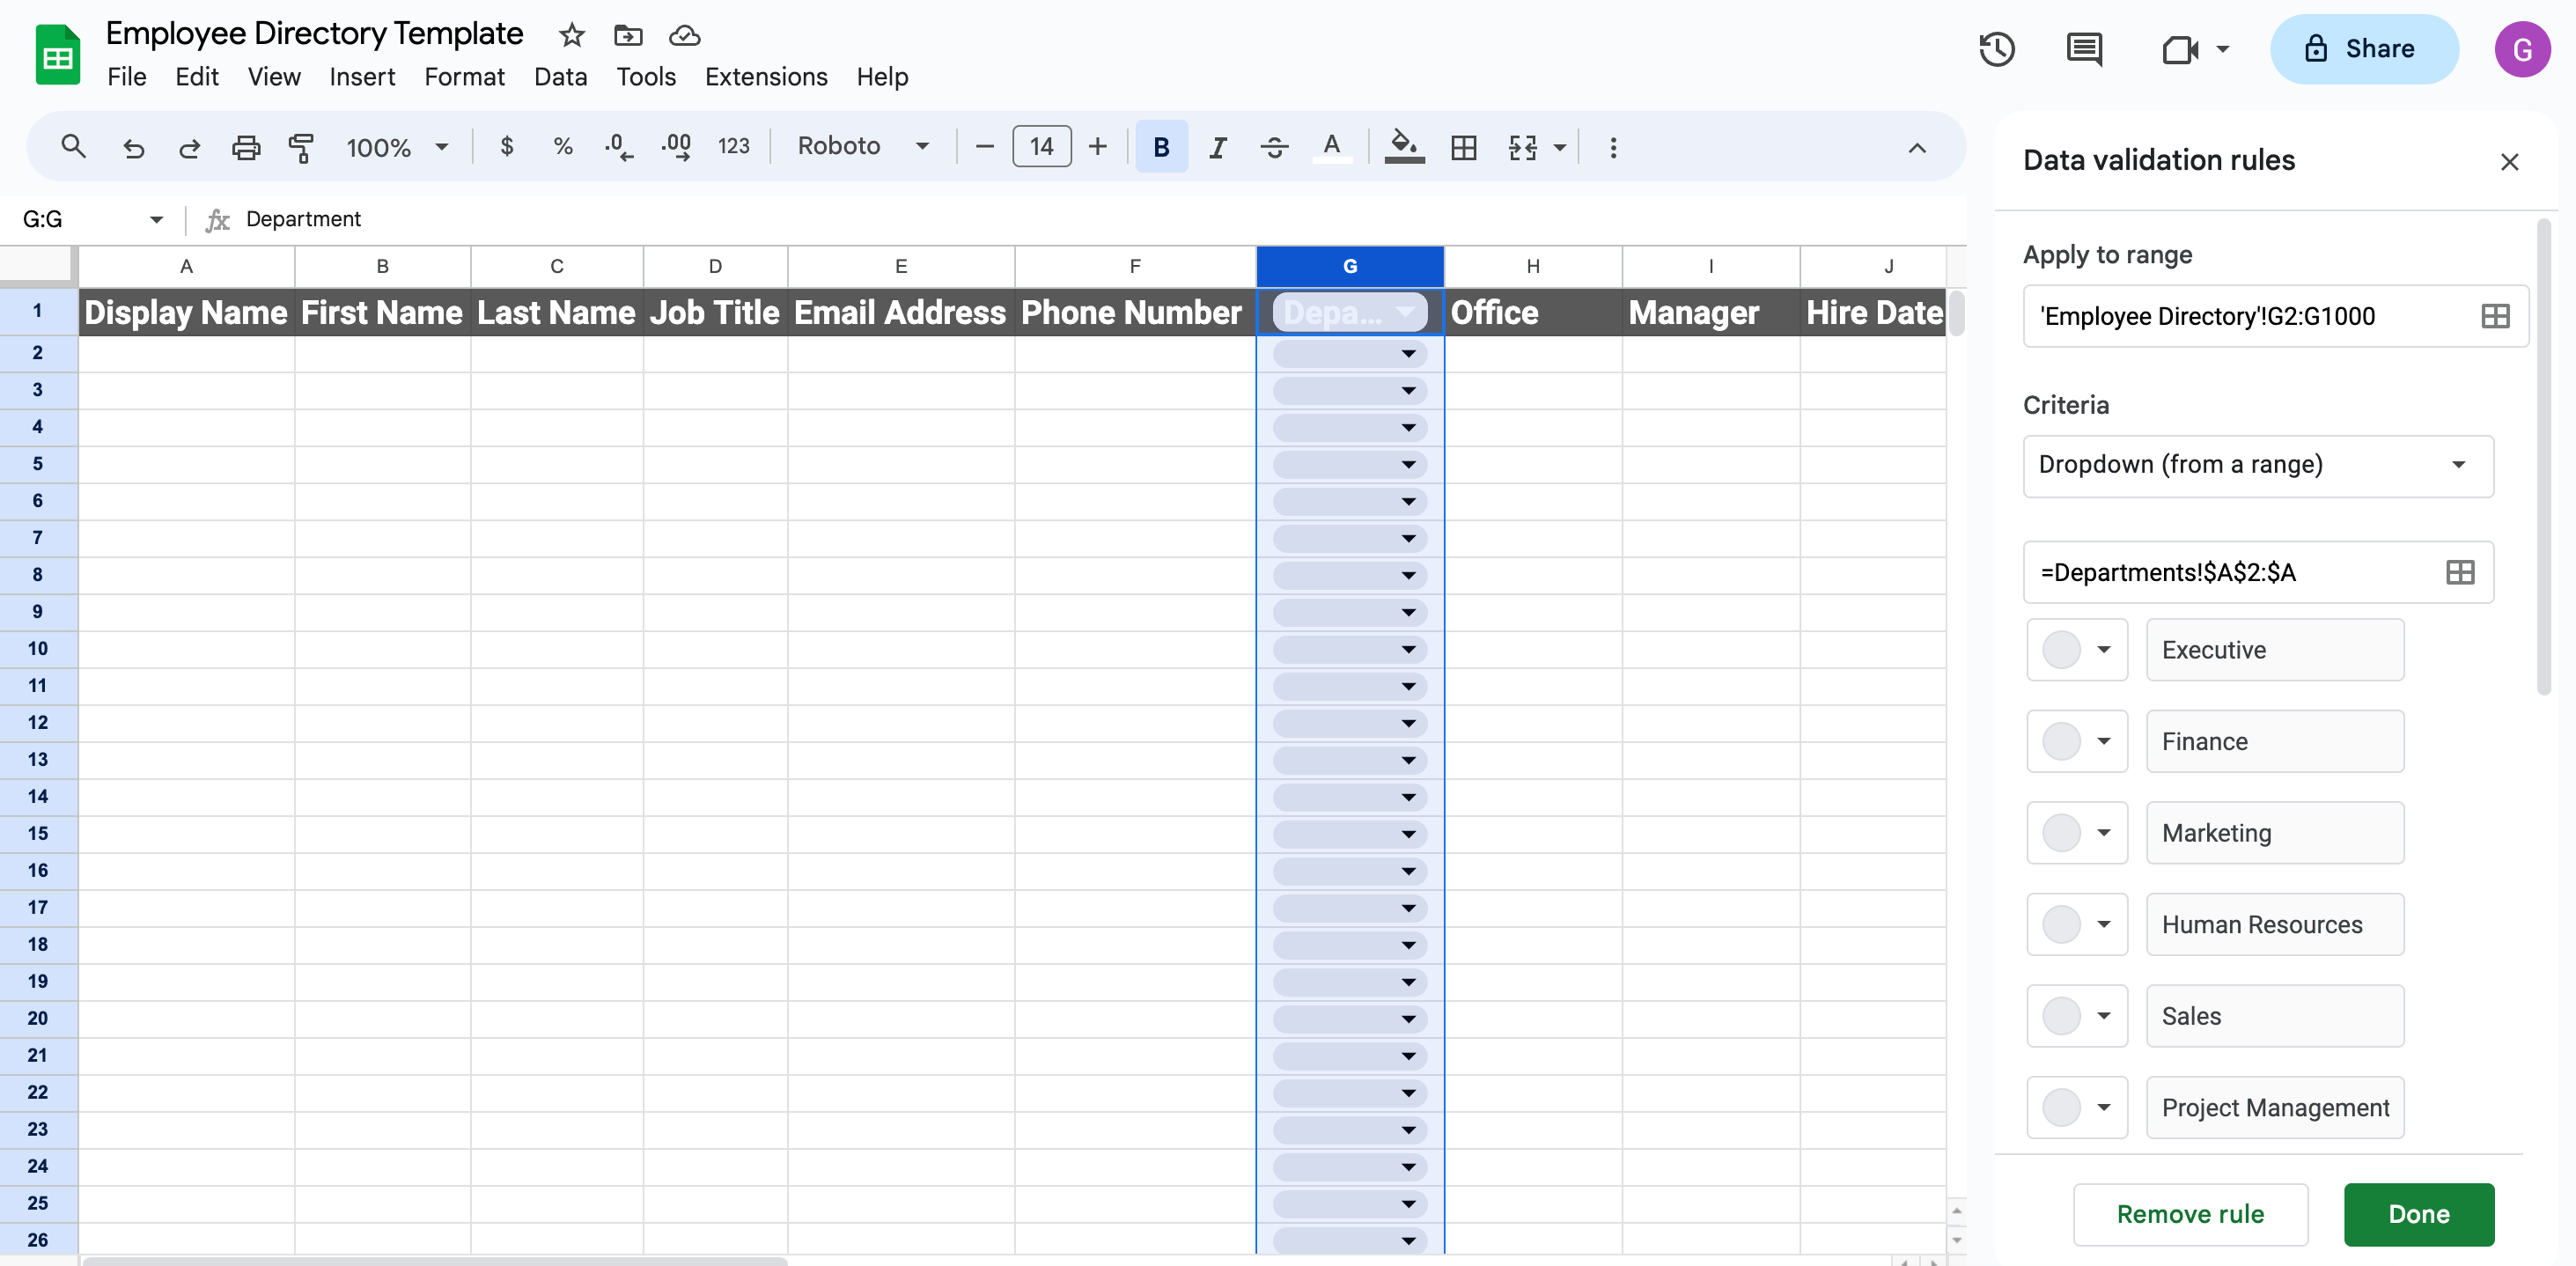
Step 5: Link Departments as a Dropdown
Now you can link this new "Departments" sheet to the Employee Directory using data validation.
- Go back to the Employee Directory sheet
- Highlight the Department column (Column G)
- Click Data > Data Validation > Add New Rule
- Apply to Range must = 'Employee Directory'!G2:G1000
- Under Criteria, select the 'Dropdown (from range)' option
- Then enter =Departments!A2:A
- Then click 'Done'
Now the Department column will have a dropdown list populated from the Departments sheet. When a new department is added to that sheet, it will automatically appear as an option.
This allows you to maintain departments in one place while having them dynamically link to the employee directory.
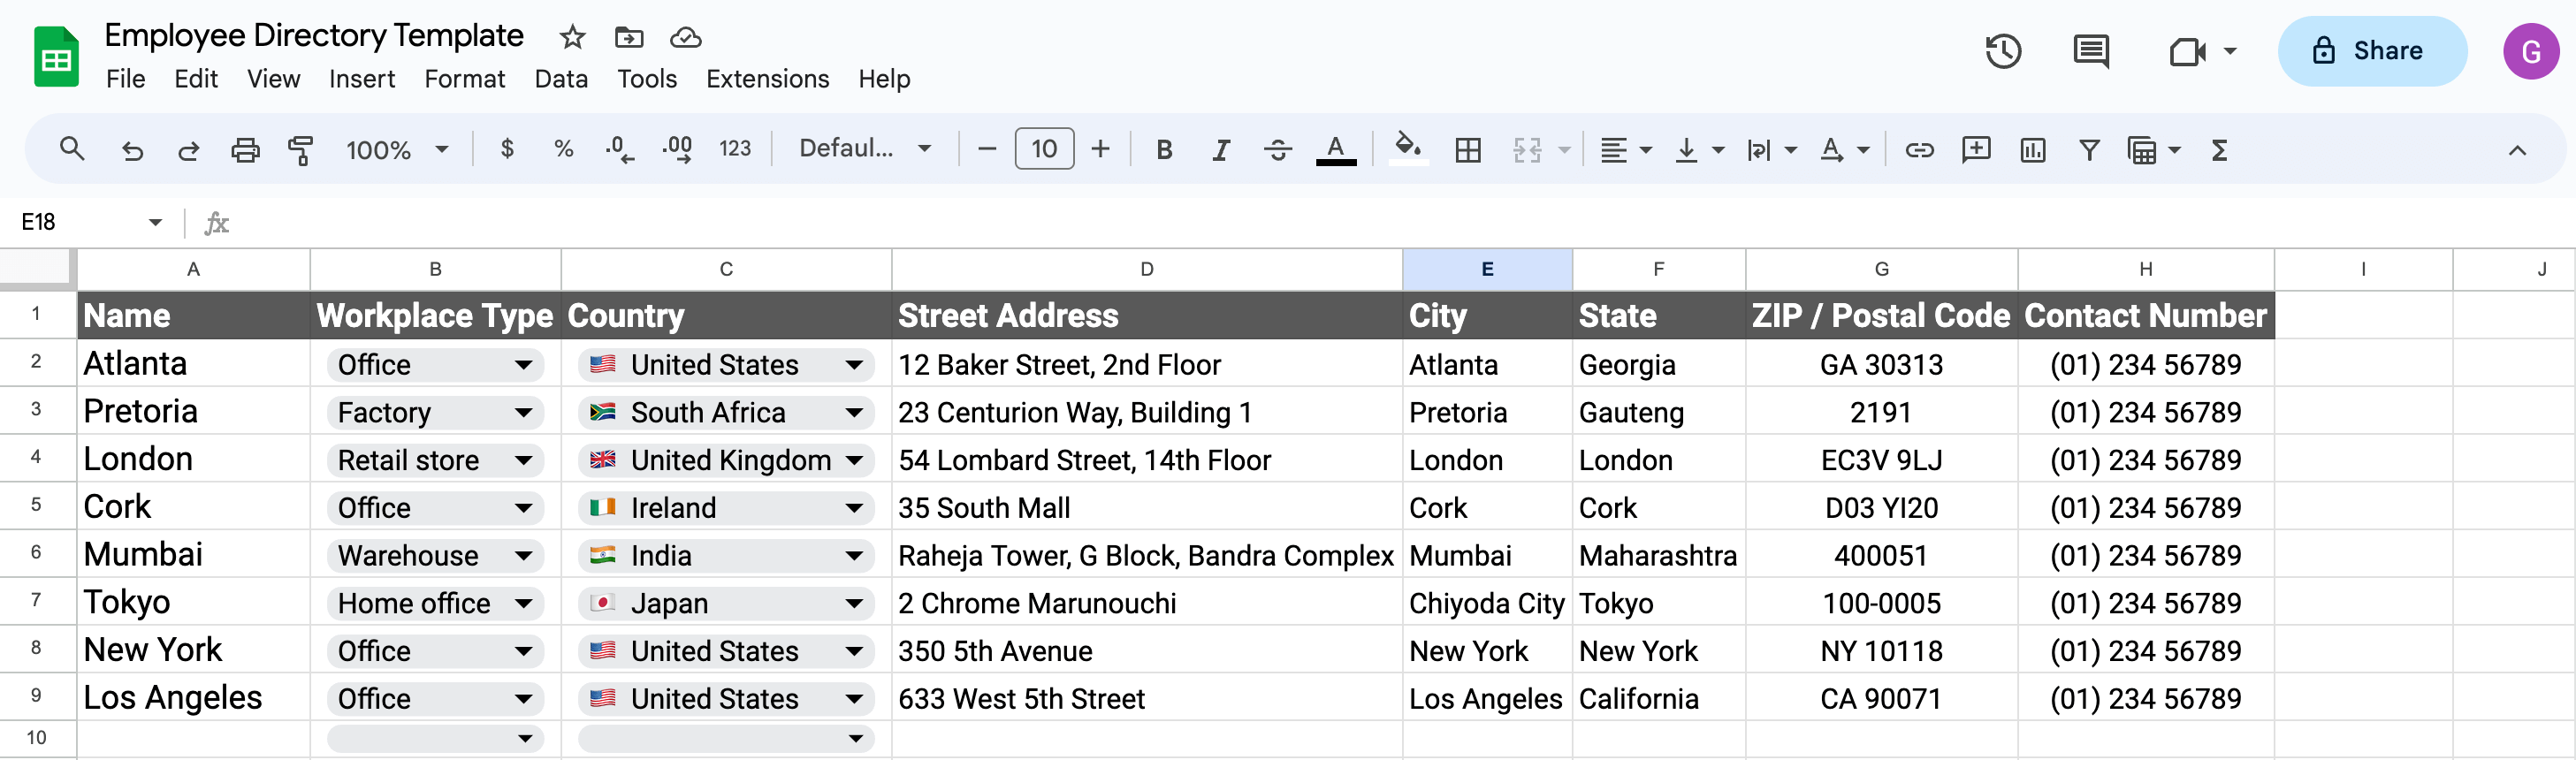
Step 6: Make an Office Directory
- Create a new sheet called "Offices"
- In cell A1 put "Office"
- In cell B1 put "Street Address"
- In cell C1 put "City"
- In cell D1 put "State"
- In cell E1 put "Country"
- In cell F1 put "ZIP / Postal Code"
- In cell G1 put "Phone Number"
- In cell H1 put "Main Contact Person"
- List each office location, address, and phone number
This gives you a directory of your different office locations.
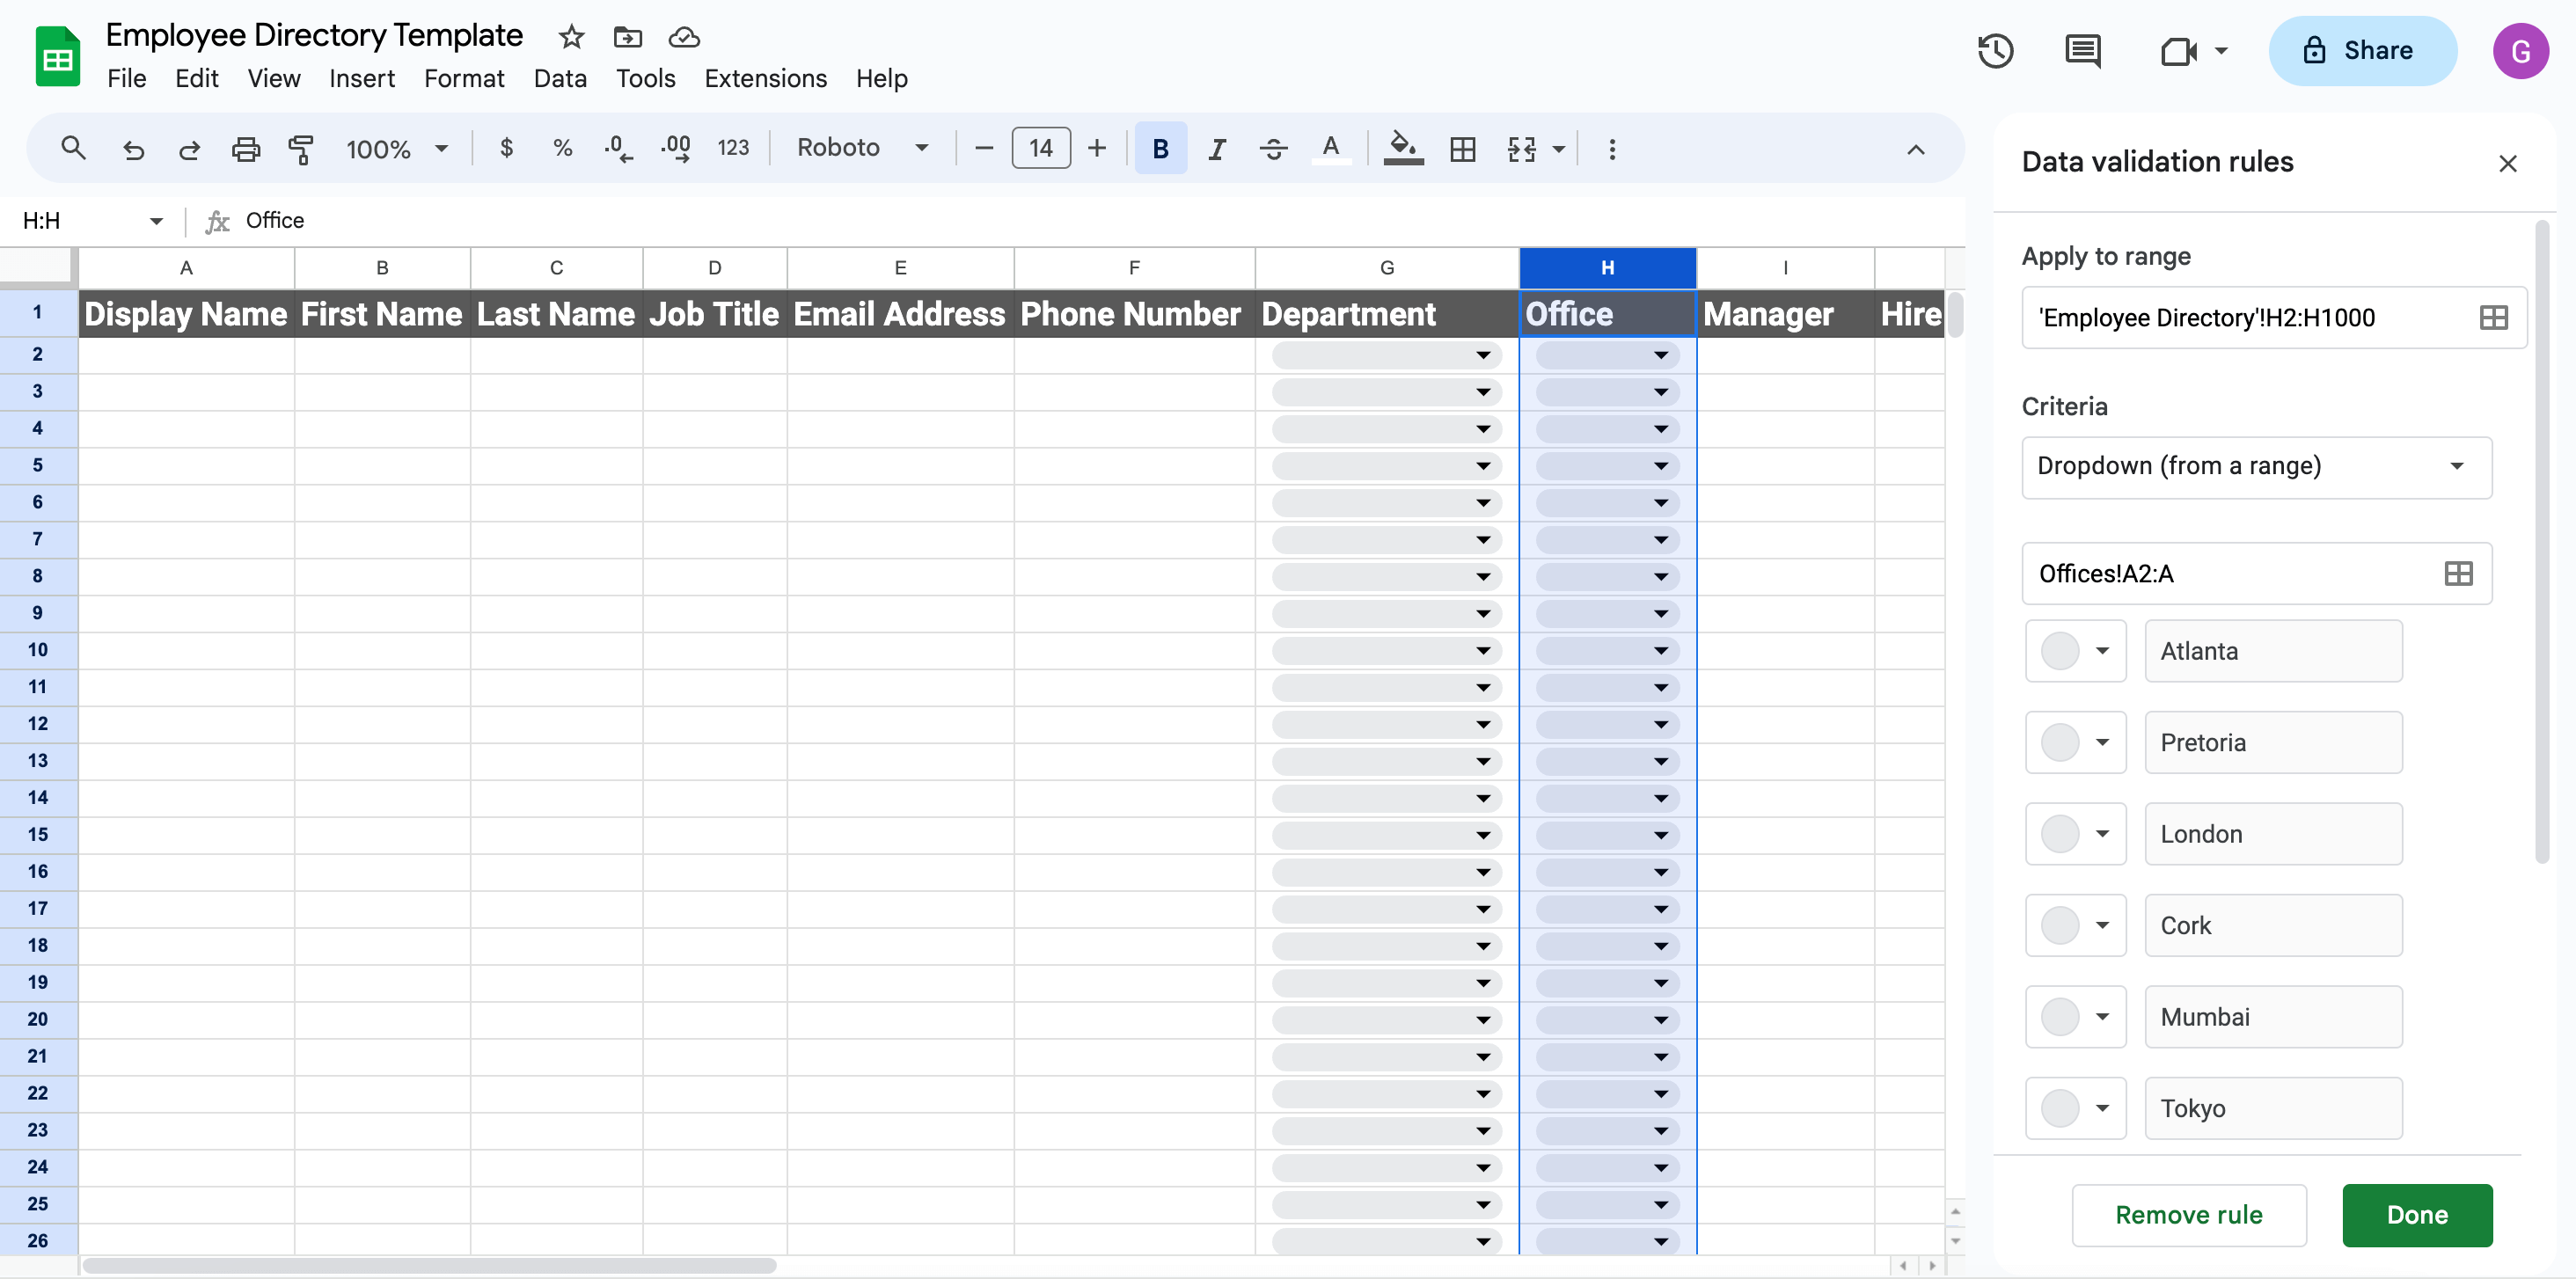
Step 7: Link Offices to the Employee Directory
Now you can link this new "Offices" sheet to the Employee Directory using data validation.
- Go back to the Employee Directory sheet
- Highlight the Office column (Column H)
- Click Data > Data Validation > Add New Rule
- Apply to Range must = 'Employee Directory'!H2:H1000
- Under Criteria, select the 'Dropdown (from range)' option
- Then enter =Offices!A2:A
- Then click 'Done'
Now the Office column will pull from the list of offices. When adding a new employee, you can select which office they are based on the dropdown. The "Offices" sheet acts as the source of truth for available options.
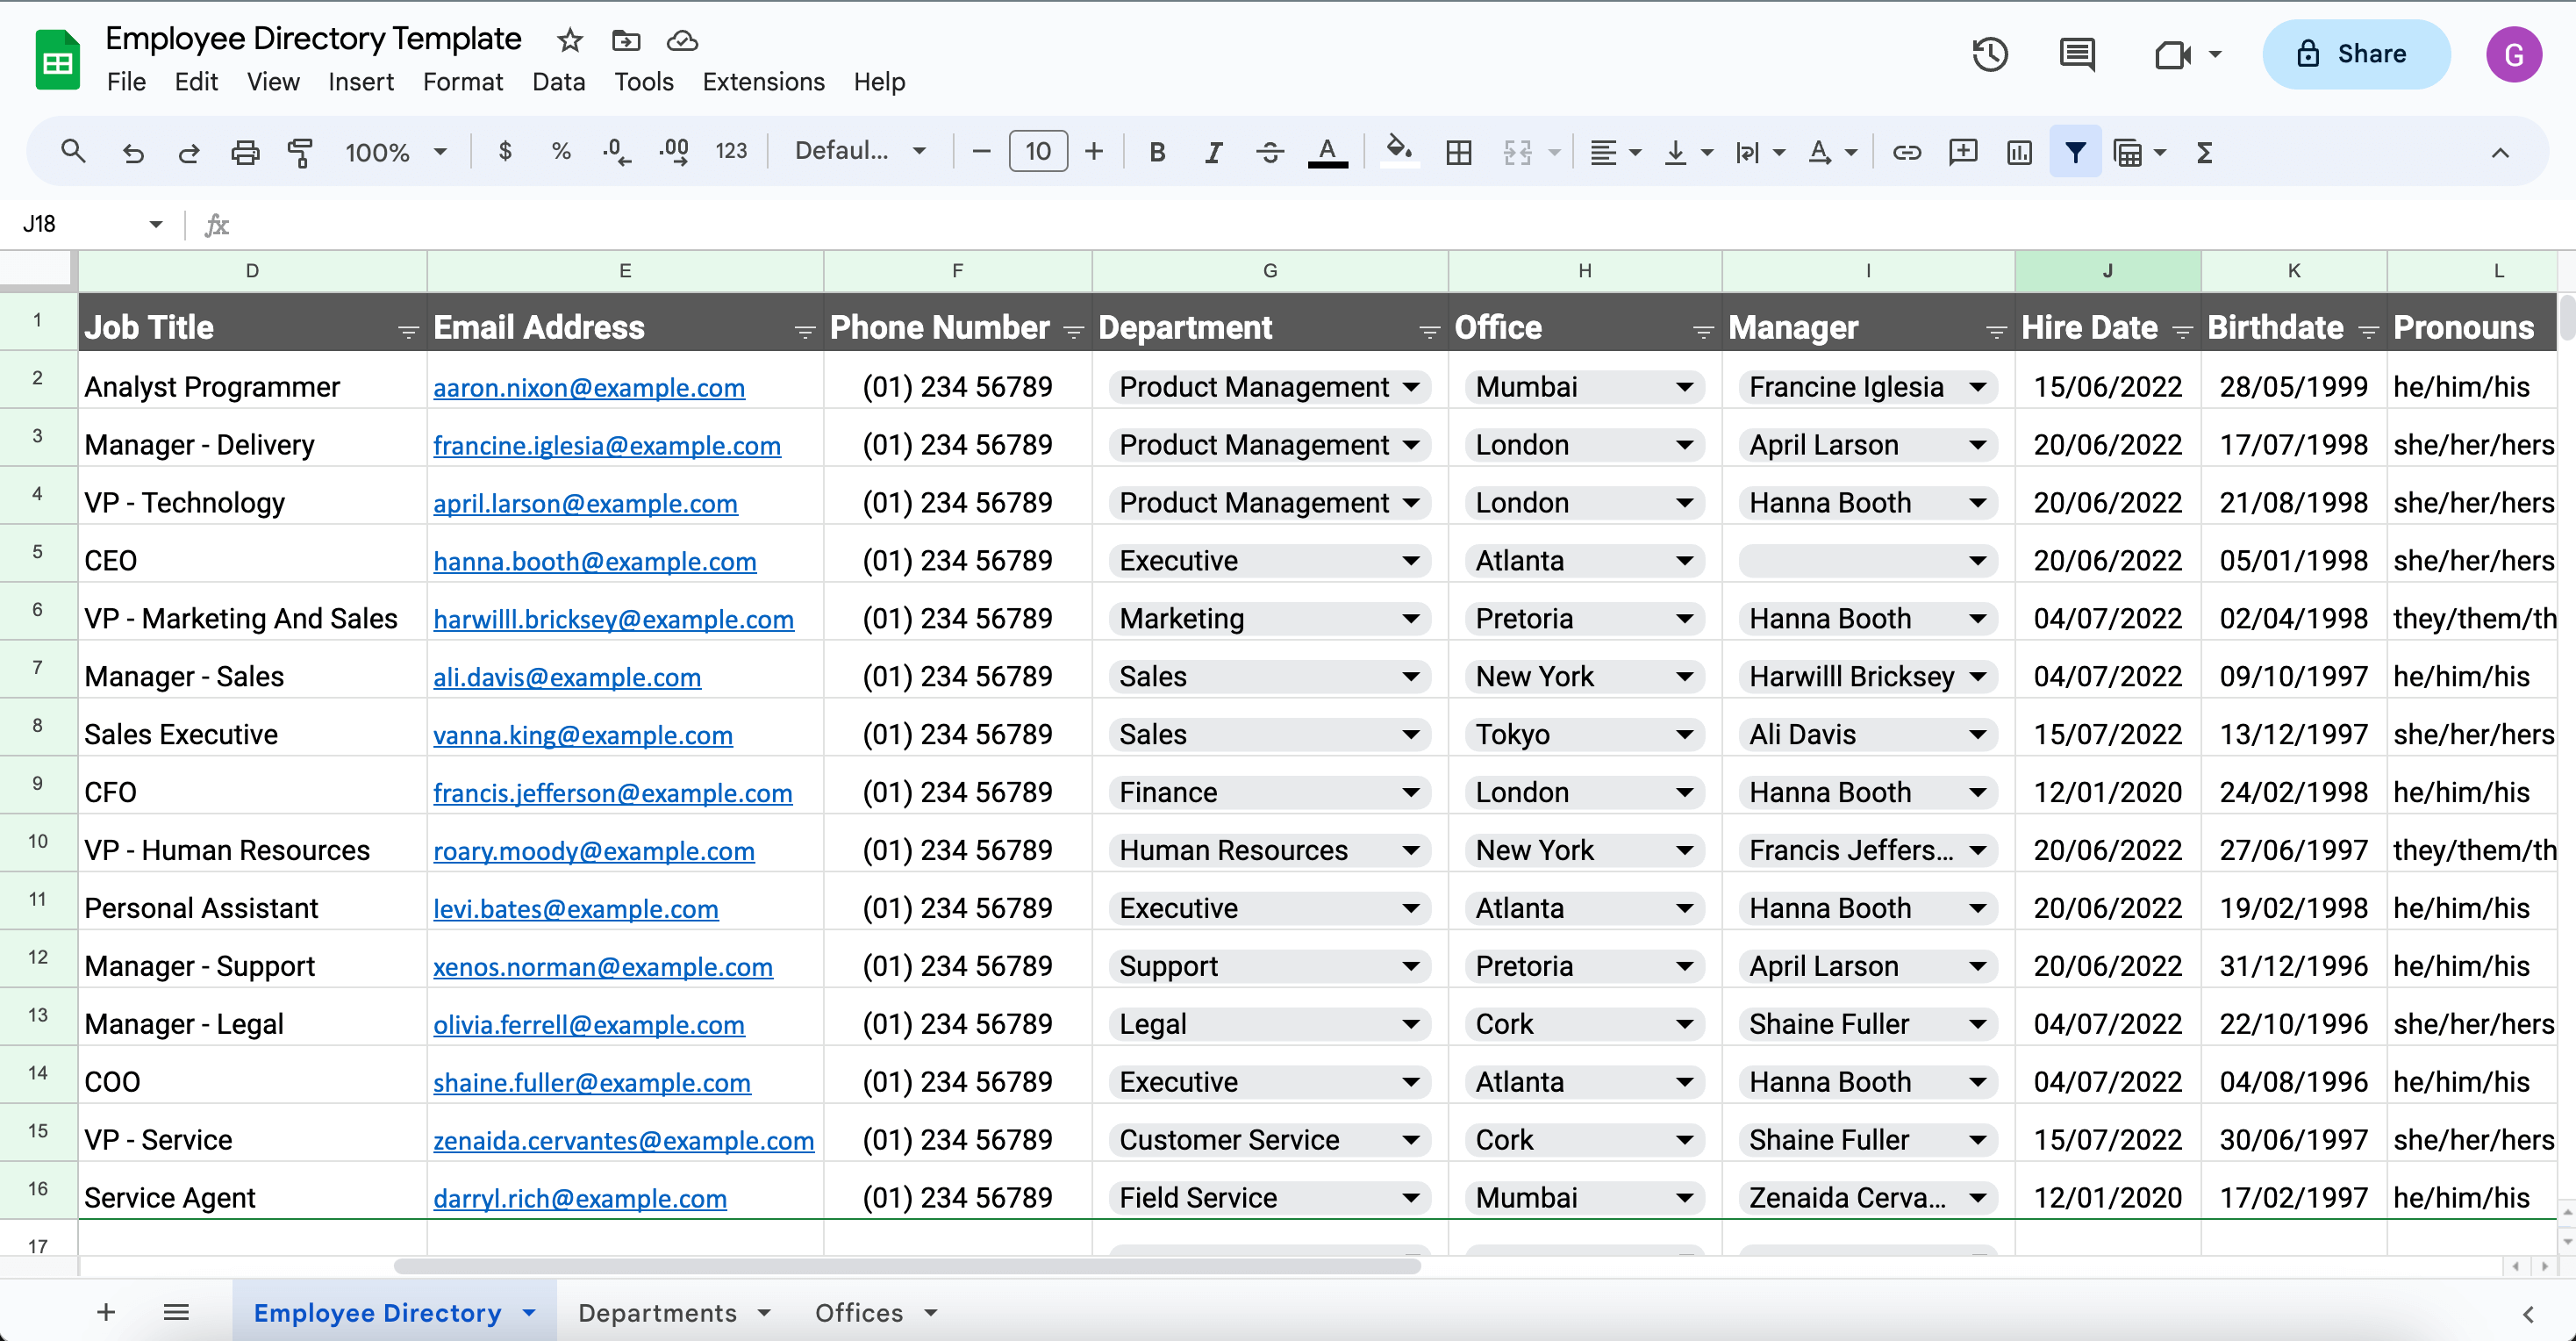
Step 8: Add Employee Data
- Starting in row 2, add a new row for each employee and fill in their data under the appropriate column headers.
- Make sure to use proper capitalization and formatting consistently.
- For phone numbers, use (XXX) XXX-XXXX format. (see How to Format Fields for Phone Numbers at the end of the guide)
- For hire date and birthdate, use MM/DD/YYYY format. (see How to Format Date Fields at the end of the guide)
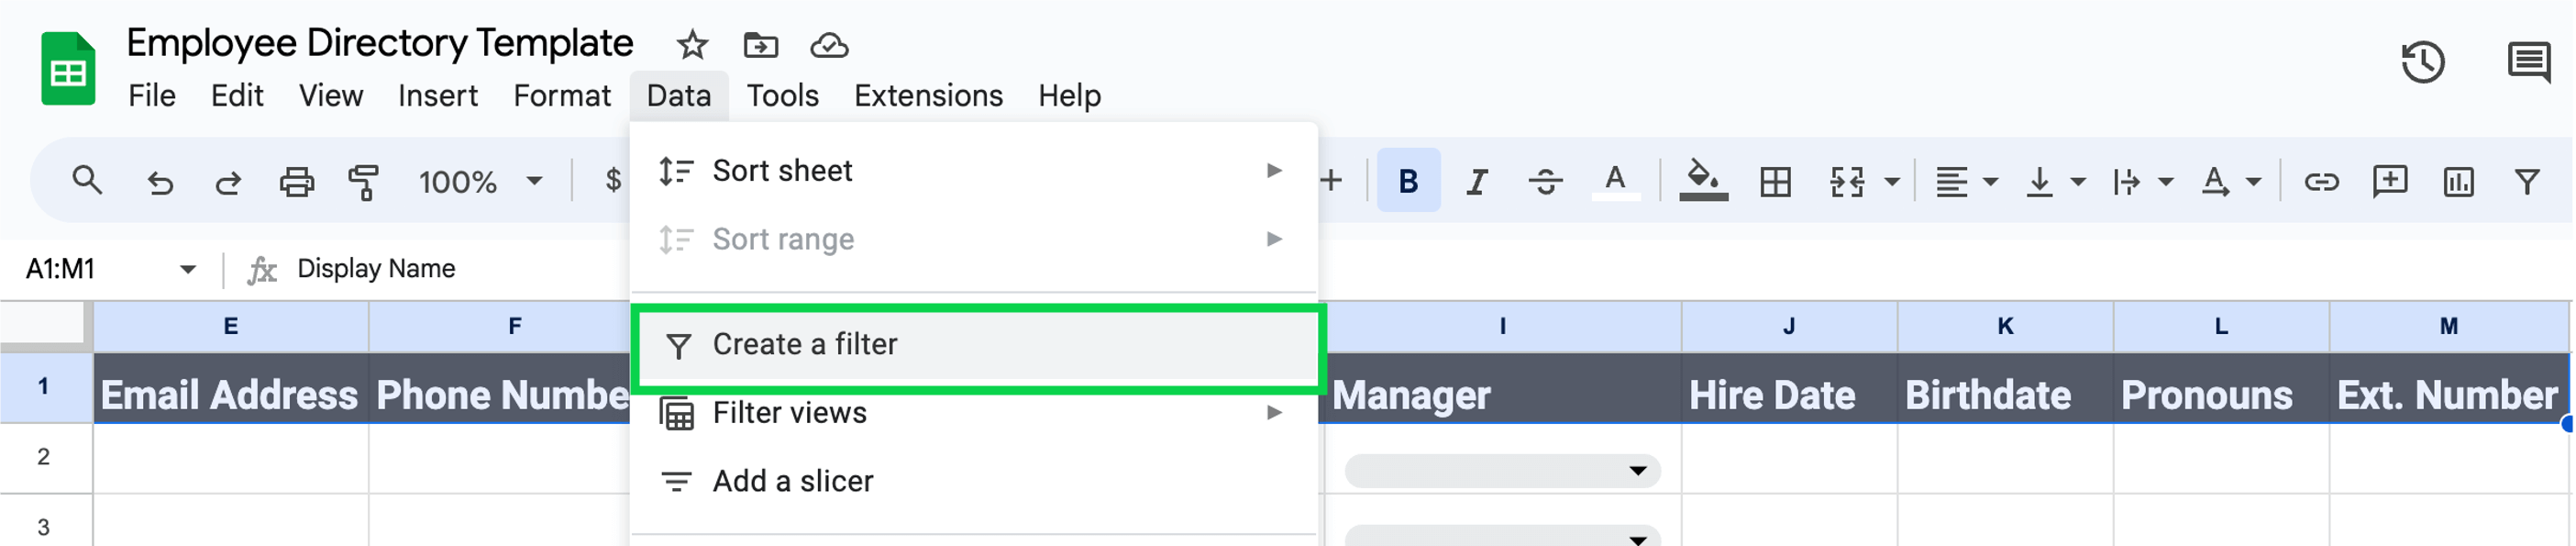
Step 9: Add Filtering
To make your Google Sheets directory more user-friendly, you can add filters that allow us to quickly search, sort, and filter the data.
- Highlight the entire header row.
- Click Data > Filter views. This will add dropdown filters to each header.
Now you can easily filter by department, job title, start date, etc.
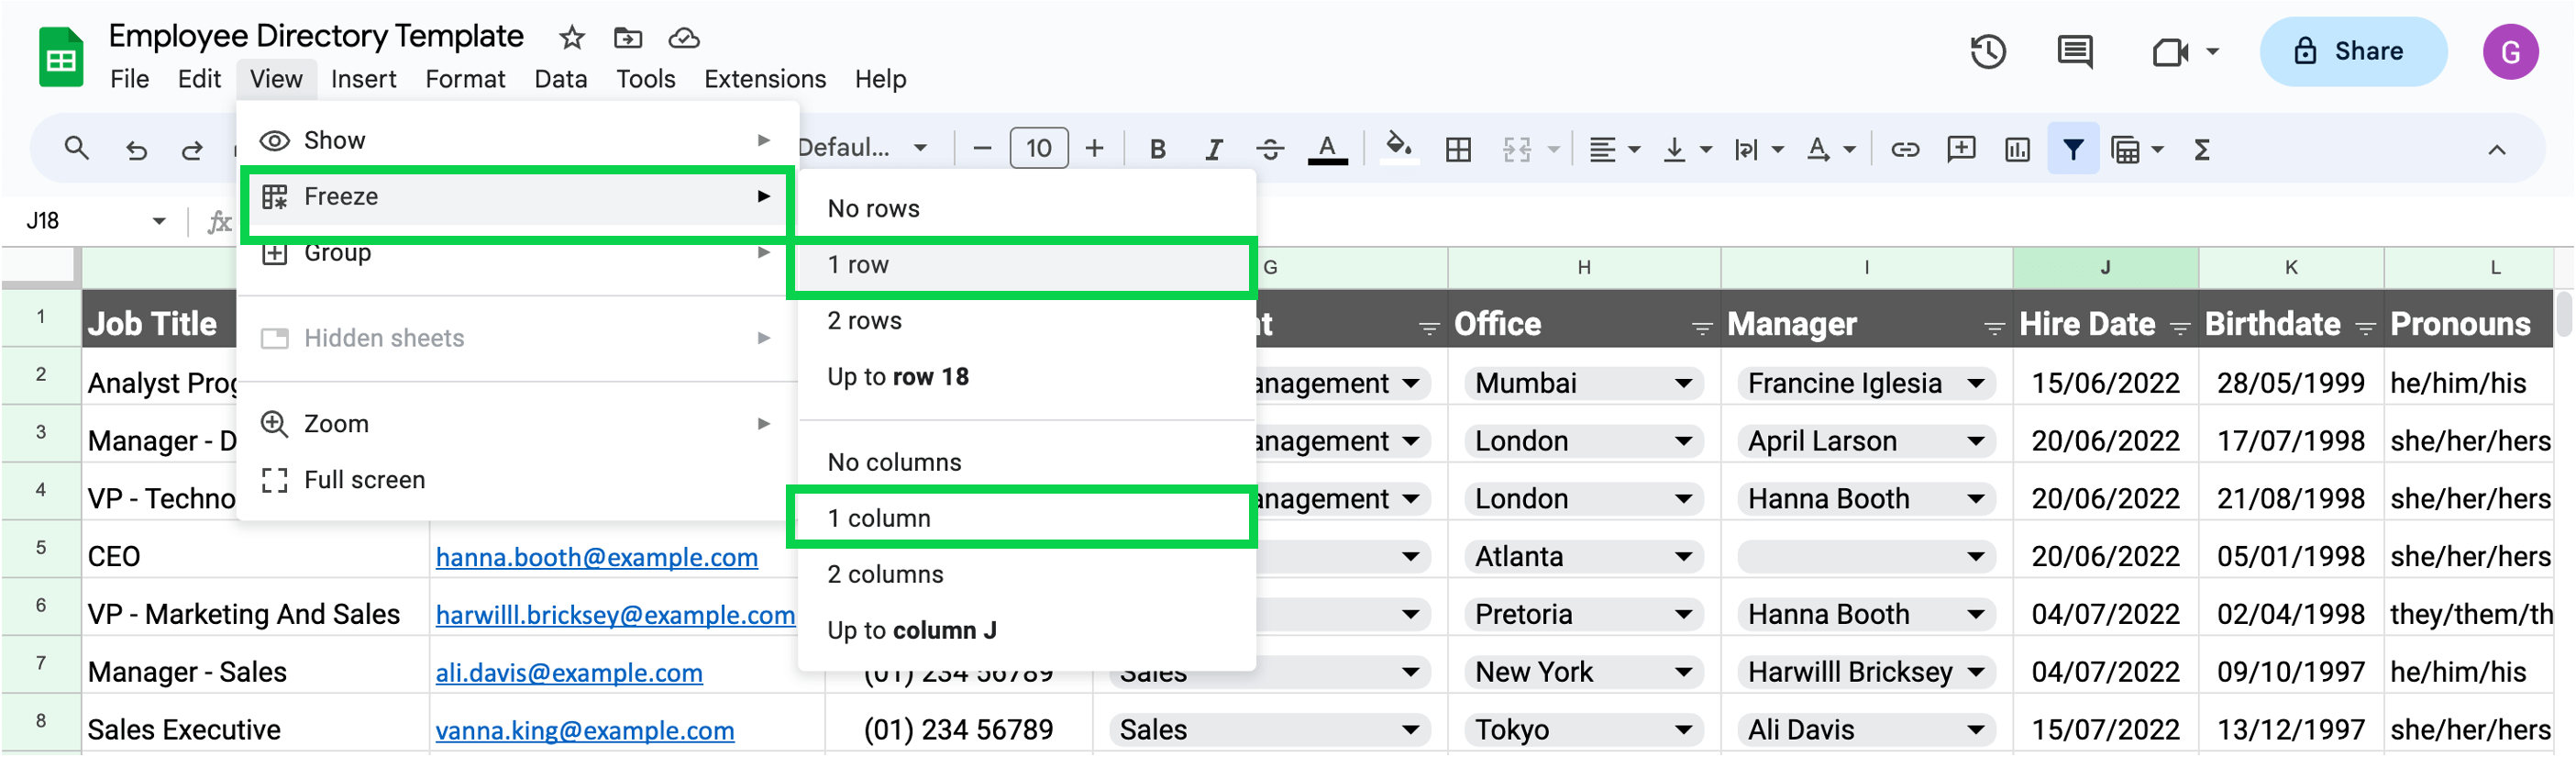
Step 10: Freeze Header Row
- With the header row still highlighted, click View > Freeze.
- Then choose Freeze '1 row'.
- Then click View > Freeze again.
- Then choose Freeze '1 column'
Step 11: Sort Columns
- By default, data will show in the order it was entered.
- To sort: Highlight the data (not including the header row).
- Click Data > Sort sheet.
- Choose how you want it sorted: by last name, department, etc.
Step 12: Share the Sheet
- To enable access: Click the Share button > Add people/groups and enter email addresses.
- Choose editor or viewer permissions.
- Click Send to complete sharing.
Now others in your organization can view and update your directory in Google Sheets!
Additional Tips
Here are a few additional tips for enhancing your employee directory in Google Sheets:
How to Create a Manager Dropdown Field
- Highlight the Manager column (Column I)
- Click Data > Data Validation > Add New Rule
- Apply to Range must = 'Employee Directory'!I2:I1000
- Under Criteria, select the 'Dropdown (from range)' option
- Select Column A (Display Name)
- This allows you to define reporting structures
How to Create an Org Chart in Google Sheets
- Use the Manager column to generate your visual org chart
- Insert > Chart > Org Chart
- Pick the Display Name column and Manager column for the data
How to Add Profile Pictures
- Insert a column for a profile photo
- Use a formula like =image("URL","Size")
- Source the URL from a cloud storage folder or drive
How to Format Fields for Phone Numbers
- For consistent formatting, use the (XXX) XXX-XXXX phone number format
- Apply this format to all existing phone numbers using the Find and Replace tool (Ctrl + H on Windows/ChromeOS, ⌘ + F on Mac)
- For new entries, use Data Validation to select between a pre-defined list of phone number formats, like:
- (XXX) XXX-XXXX
- XXX-XXX-XXXX
- +1 (XXX) XXX-XXXX
- +1 XXX-XXX-XXXX
- This ensures all numbers follow the same style, allowing for easier searching and filtering
- Alternatively, use a custom phone number format like this:
- Select the phone number column
- Right-click and select "Format Cells"
- Under Number > Special formats, choose the phone number format
- This will automatically apply the (XXX) XXX-XXXX mask as numbers are entered
How to Format Date Fields
- For consistent formatting, use the MM/DD/YYYY date format
- Apply this format to existing dates using Find and Replace (Ctrl + H or ⌘ + F)
- For new entries, use Data Validation to select from a pre-defined list of date formats like:
- MM/DD/YYYY
- DD/MM/YYYY
- MM/DD/YY
- YYYY-MM-DD
- This ensures all dates follow the same style for better organization
- Alternatively, use custom date formatting:
- Select the date column
- Right-click and Format Cells
- Under Number > Date, select the desired format
- This will automatically apply on data entry
- Consider using color coding to quickly identify start dates
- For example, highlight entries from the past year in green
Get Your Free Google Sheets Employee Directory Template
As you can see from all the steps above creating an employee directory from scratch in Google Sheets can be time-consuming.
Luckily, we have a free employee directory template for you that can give you a head start.
Access your free Google Sheets employee directory template here
Ditch those outdated Google Sheets and get a live employee directory with OneDirectory.